What you’re about to do
Seven steps, about half an hour of your time, spread over a day or two. You can stop after any step and come back later, and this page remembers where you got to.
Start with step 1Most of the work is ours. Your part is short and needs no technical knowledge, but you have to do it yourself, because it’s what puts everything in your name.
You do
- Open one account, on your own email
- Choose the password
- Pay for the domain, about US$10.50 a year
- Click two confirmation emails
- Invite us in, and remove us afterwards
We do
- Design and build the website
- Find domain names that are available
- Put the website up and connect the domain
- Set up the enquiry form
- Check it all works before we finish
Whenever this guide says “tell us”, email support@studwright.com.au or reply to any text we’ve sent you.
What you end up owning
One account and a folder of files. The account is in your name, with your email on it and a password only you know. We never have it.
- Your domain name. The address people type. About US$10.50 a year, at cost, on your card. Cloudflare charges in US dollars. Nobody else can take it while it keeps renewing.
- Your hosting. Where the site actually sits, in the same account as the domain, on Cloudflare’s free plan, which covers a site this size.
- Your enquiry form. It emails you when a customer fills it in. It runs inside the same account and costs nothing, however many enquiries you get.
- The files. The website itself, and your photos. We send you a copy at handover.
Nothing renews with us, and your website doesn’t depend on any account of ours. If you never speak to us again, it stays up.
Step 1 of 7
Before you start
Two things to have on hand. There’s nothing to install. It all happens in a web browser, and a computer makes it easier than a phone.
An email address you’ll still have in five years
This is the important one. Everything gets built on it, and it’s how you prove the site is yours if it’s ever disputed. A personal address you’ve had for years is better than a new one made for the business, and far better than one that belongs to an internet provider you might leave.
A card, for the domain
The domain name is the one thing with a running cost: about US$10.50 a year at the time of writing. It goes on your card so the renewal is yours and never lapses because of us. It’s the only payment detail anyone will ask you for.
Why not a .com.au?
You can have one, and some people prefer the local look. It costs you more work: .com.au has to be bought from a separate Australian company, it requires an active ABN held in the same name for as long as you keep the domain, and it adds a step where you copy settings between two accounts.
A .com needs no ABN, costs about the same, and is bought in the same place as everything else, which is why we suggest it. Tell us if you’d rather have the .com.au and we’ll walk you through the extra part.
Make your account
One account holds everything: the domain, the website and the enquiry form. It’s free and takes about a minute.
-
Go to dash.cloudflare.com/sign-up
Cloudflare is the company that will hold your domain and run your website.
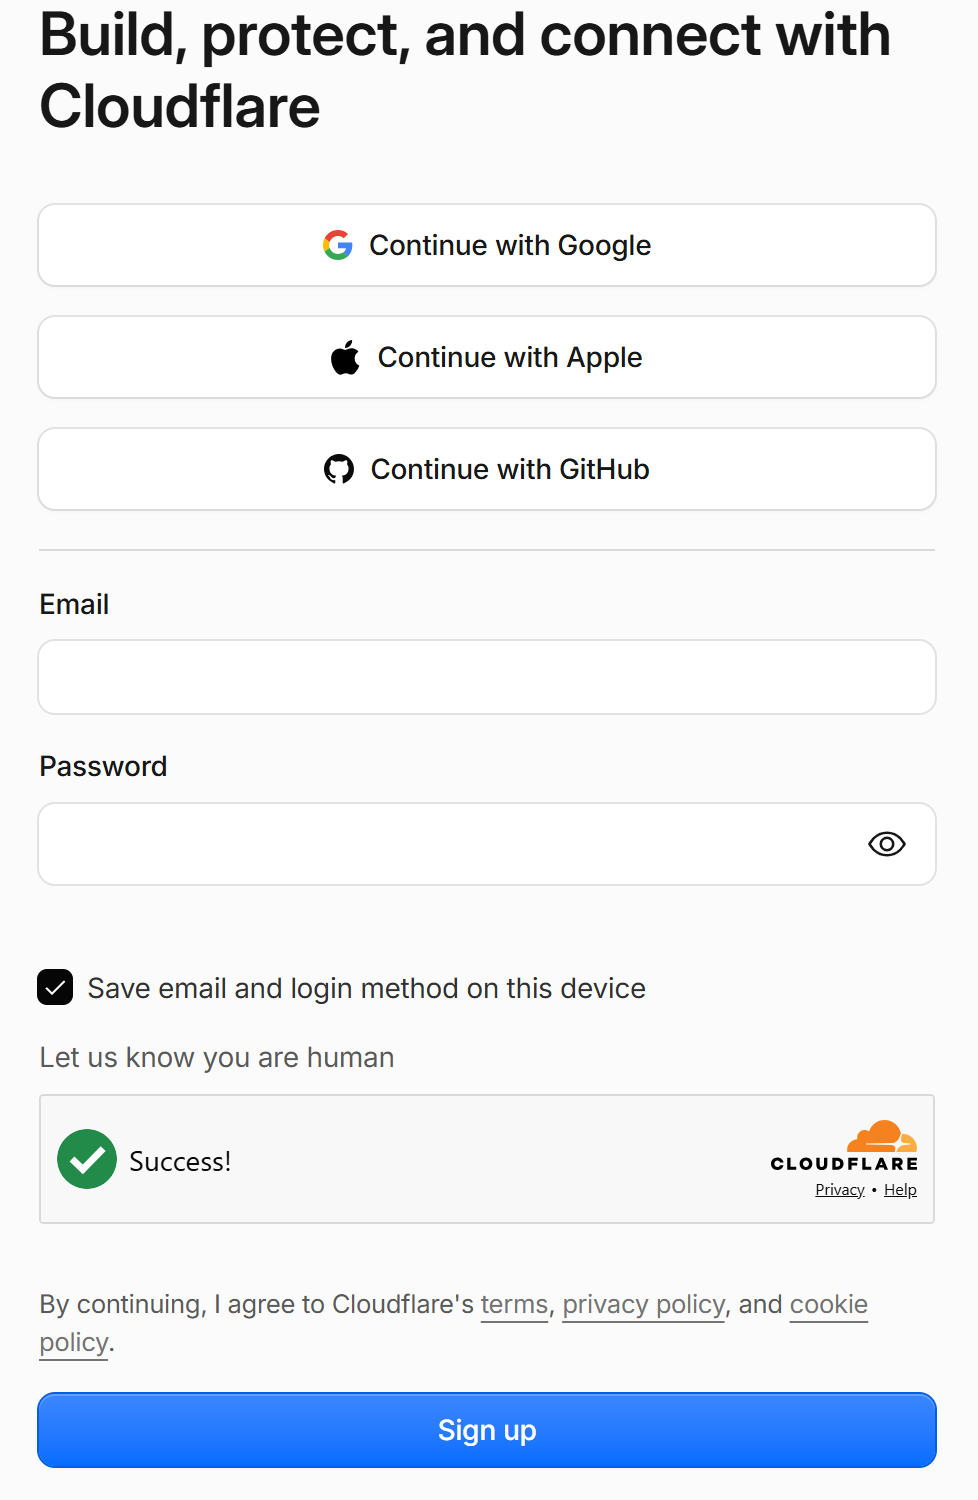
- If you have a Gmail address, use “Continue with Google”. It’s the quickest way in, and there’s no new password to remember. The account is just as much yours either way.
- Otherwise, type the email address you chose on the last step.
- And pick a password. Write it down, on paper or in a password manager, before you click. We never see it and we’ll never ask for it. Anybody who asks for it isn’t us.
- Sign up.
-
Click the confirmation email
They email you straight away to check the address is real. If it hasn’t arrived in a few minutes, look in spam.
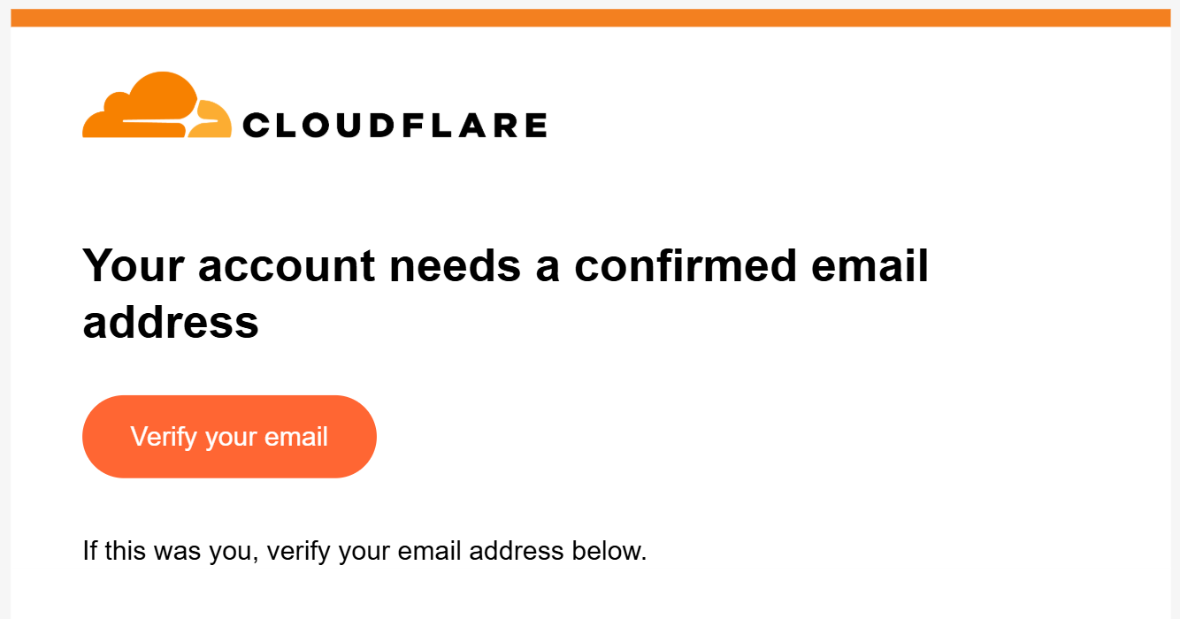
- One click on Verify your email, and this step is done.
Buy your domain
The address people type to reach you. You buy it inside the account you just made, which is the reason there’s nothing to connect up afterwards.
-
Find the domain page and search for the name we sent you
We send you two or three names that are available.
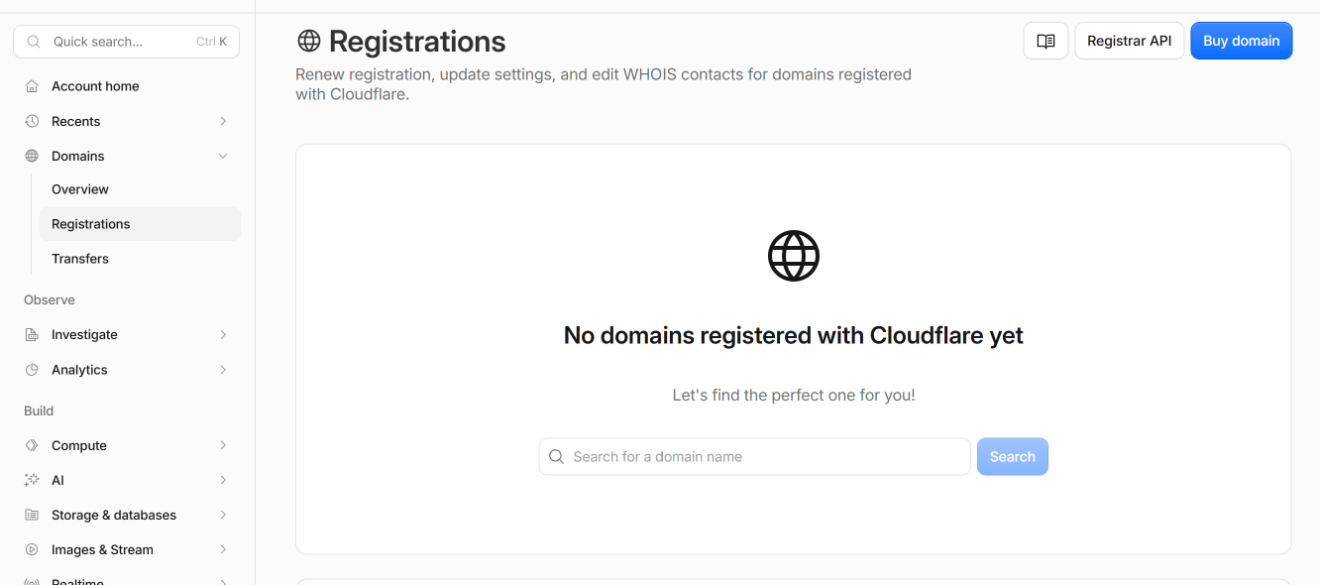
- In the menu down the left, open Domains, then Registrations.
- Type the name into the search box and press Search. It’ll say whether it’s free and what it costs.
It’ll say “No domains registered with Cloudflare yet”. That’s expected: you’re about to register the first one. -
Fill in who owns it
This is the part that makes the name legally yours, so it’s your details here and not ours.
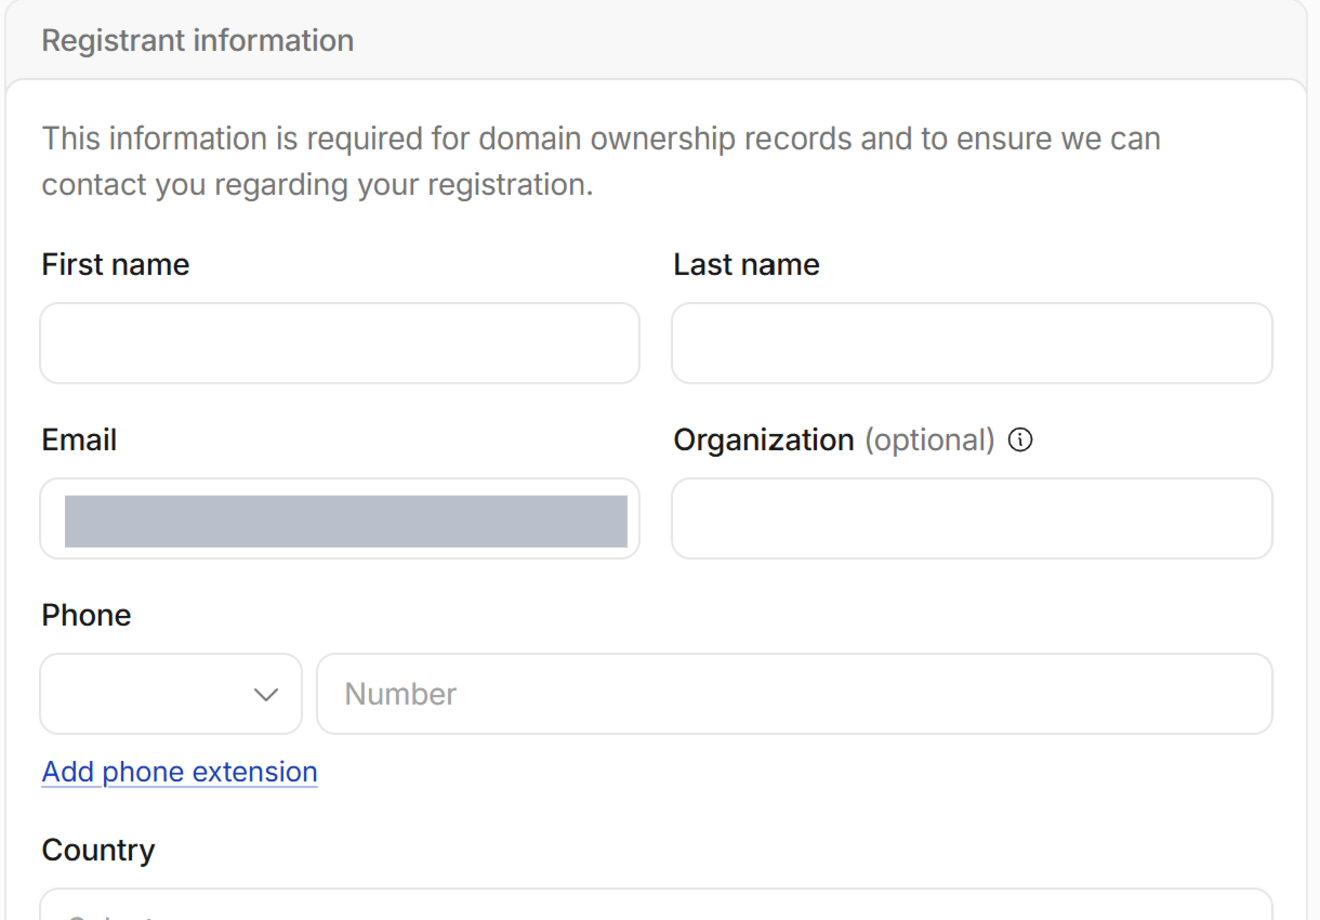
- Your name. Not the business name: this is the person who owns it.
- Your email. It fills itself in from the account you just made, which is correct. Leave it.
- Your phone number.
- Country. Then keep scrolling: the form carries on below the bottom of this picture.
Organisation is marked optional and you can leave it empty. -
Check two things, then pay
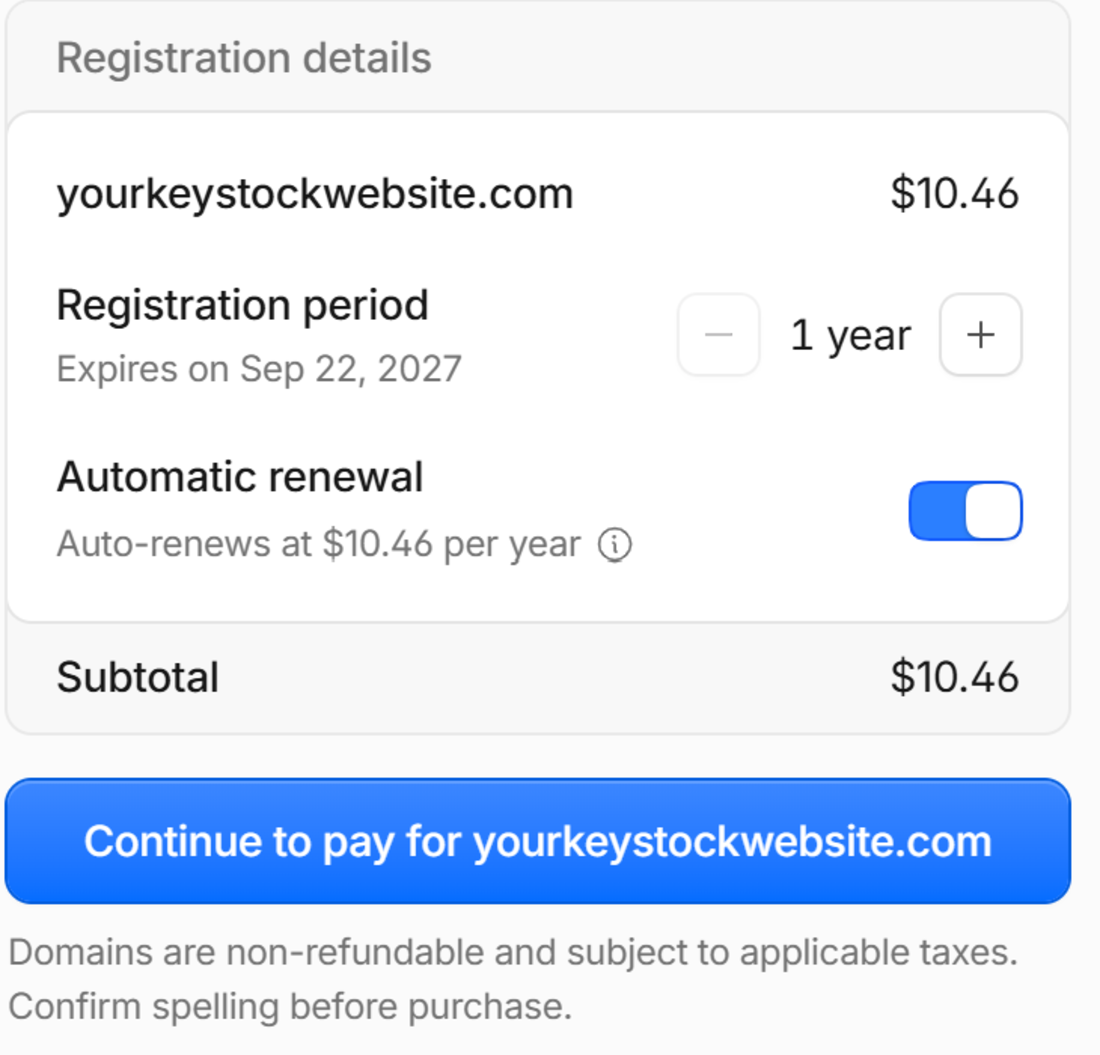
- The name, spelled exactly right. Read it once more. Domains can’t be refunded, so a typo means paying again for the right name.
- Automatic renewal is on. It’s on by default, and blue means on. Leave it on.
- Pay. About US$10.50 for the year, on your card.
Cloudflare sells domains at cost, so there’s no cheap first year that jumps later.
The one thing that can really go wrong
If the domain lapses, the site goes dark and somebody else can buy your name. So leave automatic renewal on, and use a card that won’t quietly expire. Put a yearly reminder in your phone as well.
Nobody asked me to change any settings. Is that right?
Yes. The page says your domain will automatically use Cloudflare’s nameservers, and because you bought it in the same account that runs the site, the two are already joined up.
Let us in
One invitation, which you can withdraw the moment we’re finished. Your password is never part of this.
-
Open Members, and start an invitation

- Top left of the dashboard: Manage Account, then Members.
- Then the blue Invite members button.
Below this, the list of members will show only you until we accept the invitation. -
Put in the address we gave you
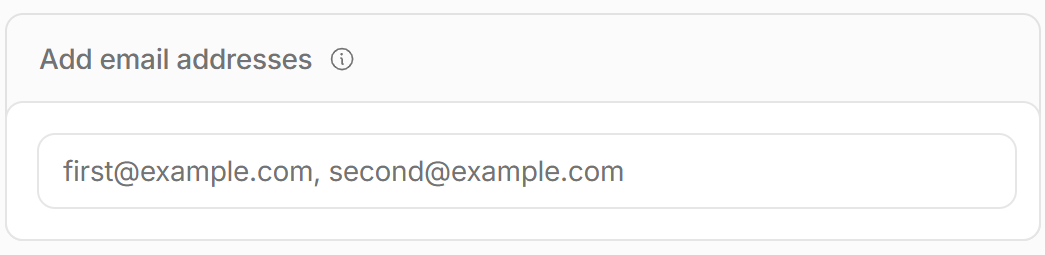
- One address: the one we sent you. Ignore the grey “second@example.com”. It’s only an example of the format.
-
Choose what we’re allowed to do
This screen looks more complicated than it is. You need one thing from it.

- Click the arrow beside Overall roles to open the list.
- Find Administrator and turn on the switch at the end of its row. It turns dark grey when it’s on, and it’s the only one that should be.
Cloudflare’s description beside it is accurate: everything in the account except members and billing. That’s what lets us upload your website and set up your enquiry form. It can’t change your card details or invite anyone else, and you remove it in step 7. Don’t use the switch on the Overall roles row itself, at the top right beside the count. It turns on every role in the group, including Super Administrator. Open the list and switch on Administrator only.
-
Two buttons, in this order
Press both. The first one doesn’t send anything.
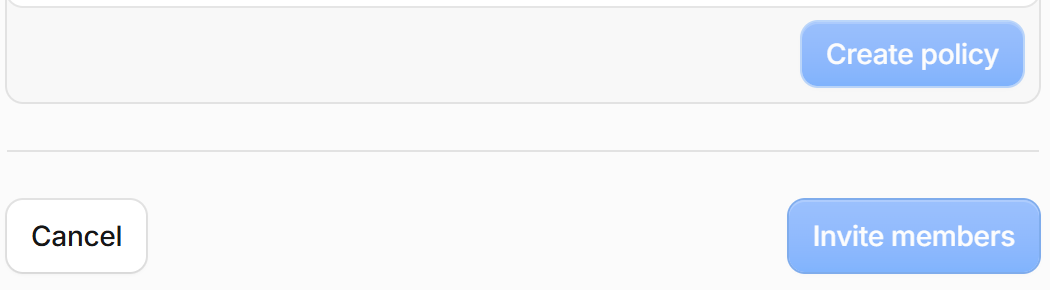
- Create policy first. This saves the permission you just chose.
- Then Invite members. That’s what sends it.
We build it
Nothing for you to do here, and you don’t need to be around for it.
We put the website up, point your domain at it, turn on the security certificate so the address shows a padlock, and set up the enquiry form.
We text you when your address brings up your website. If you want to watch, type your domain into a phone every so often. It goes from nothing to your website in one step.
It’s been a while and my domain still shows nothing
Give it an hour from when we tell you it’s live. A brand new domain can take that long to start working everywhere, and nothing is wrong while it does.
After that, tell us. It’s ours to fix.
Check enquiries arrive
The enquiry form on your website emails you when a customer fills it in. There’s no separate account and nothing to pay: it runs inside the account you already made.
-
Tell us which inbox enquiries should land in
It can be a different address from the one the account is built on. You might want the account on a personal address and enquiries on a work one.
-
Click one more confirmation email
We add that inbox to the form’s settings, and Cloudflare emails it a link to check it’s really yours. Click the link. The form can’t send anything to the inbox until you do.
-
We send a test enquiry and you tell us it landed
We fill in your enquiry form while you have your inbox open, so you see it work for yourself.
If the test doesn’t arrive, we’re not finished. Look in spam first. If it’s there, mark it “not spam”, which teaches your mail provider to trust the next one. Then tell us.
Is there a limit on how many enquiries I can get?
No. The form sends to an address you’ve confirmed is yours, so it doesn’t count against any quota. It’s free however busy you get.
Remove our access
The last step, and the one that makes the account entirely yours again.
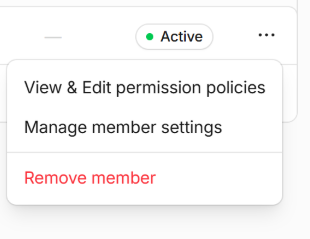
- Find our row, not yours, and click the three dots at the end of it.
- Remove member. It’s the red one at the bottom of the menu.
That’s everything. The account, the domain, the website and the enquiry form are all yours, on your email, with a password we’ve never seen.
Changing your website
New hours, a new phone number, a price that has moved, a note that you’re shut for a week.
Today: you ask, and we quote it
Tell us what you want changed. We tell you the cost before we touch anything, and nothing is done until you say yes. If you do, invite us back in the way you did in step 4, and remove us again when it’s done.
Changes are the one thing the single payment doesn’t cover. Apart from the domain, running the website costs you nothing. Us editing it for you is paid work.
What’s a quick change, and what’s a bigger job?
Wording, hours, phone numbers, prices, adding or removing a service, swapping a photo. Things that fit the page as it already is.
A new section, a second page or a different layout is a bigger job, and we’ll quote it as one.
Can I edit the files myself?
Yes. You own them, and the website is a single HTML file. Anyone who works with websites can edit it, and so can you if you’re willing to learn. You don’t need our permission, and you can always put back the original.
Coming: changing it yourself, from your phone
We plan to offer an editor that will let you change the simple things, like hours, phone number and prices, from a page of your own. It doesn’t exist yet, so until it does, changes are paid work, as above.
It won’t change who owns what, and your website won’t depend on it. The editor writes changes to your website, so if it ever stopped working your website would carry on exactly as it is.
Keeping it working
Three things need occasional attention. Each takes about a minute.
1. The domain renews once a year
Automatic renewal handles it as long as the card on file is current. If you get a new card, update it. This is the only one that can take your website offline.
2. Test the enquiry form every few months
Fill in your own enquiry form and check it arrives. A broken form and a quiet month look the same from your inbox.
3. Keep your Google listing right
Your Google Business Profile is often how people find you first, and it’s free. Keep the hours accurate, especially at Christmas, and ask happy customers for reviews. If you change your phone number, change it there too.
If something looks wrong
Check these in order.
The website won’t load at all
The likeliest cause is a lapsed domain. Open your account, go to Domains then Registrations, and see whether it says expired. If it does, renewing it brings the website back, usually within the hour.
If the domain is fine, check whether it’s only you: try it on mobile data with the wi-fi off. If it works there, the problem is your own connection.
Enquiries have stopped arriving
Send yourself one through the form. If it arrives, they were probably going to spam. Find an old one, mark it “not spam”, and add the sender to your contacts.
If it doesn’t arrive at all, tell us. There’s no monthly limit to run into and nothing for you to set up again. It’s ours to look at.
Something on the website is wrong or out of date
Tell us what it should say. Your account keeps a history of the versions that have been published, so it can be put back the way it was.
My phone number changed
Send us the new one and we’ll change it everywhere on the website at once, including the call button.
Change it on your Google Business Profile too. The website can’t update that for you, and it’s often the first place people look.
I’ve lost my password
If you signed up with Continue with Google, there’s no Cloudflare password. Use that button again.
Otherwise, use “Forgot password” on the sign-in page. The reset goes to the email address the account was made with, which is why that address matters more than the password.
Taking it somewhere else
You can leave whenever you like. Here’s how.
You don’t need our permission or our help, because nothing of yours runs through us.
- To another designer. Invite them as a member, the way you invited us in step 4, and send them the folder of files. Remove them when they’ve finished. Never give anyone your password.
- To a different host. Your domain isn’t tied to where the website is hosted. Your new host will tell you which records to change, under DNS in your own account.
- Away from the website entirely. Delete the website from your Cloudflare dashboard. Keep the domain if you might want it again. It’s cheap, and it stops anyone else using your name.
If you’d like help handing it over, ask, and we won’t charge for it.